Using Cement Board Outdoors: 9 Essential Tips

Contractors commonly use cement boards as indoor flooring and wall base to fortify a structures’ overall integrity. However, not many homeowners know whether these boards are suitable for outdoor use. In most cases, homeowners opt for gypsum boards when fabricating the structural foundation of exterior structures.
Cement boards serve as the base of outdoor fixtures such as exterior walls and flooring. For a long-lasting installation, cover the bare, unfinished surface with an adhesive mortar and a moisture barrier, leavie a 1/8-inch (0.32-cm) gap between the boards, and fill the gaps in with silicone caulk.
Are you considering using cement boards as the base of your exterior walls and flooring? Keep reading as we explain the pros and cons of using cement boards outdoors, properly installing them on exterior fixtures, and assessing if they’re the best option for your project.
Can Cement Boards Be Used Outdoors?
A common misconception about cement boards is that they’re only suitable for indoor use. Yes, they’re an excellent foundation for various fixtures such as tile flooring, kitchen countertops, and indoor walls, among others. However, their use isn’t limited to indoor construction. Cement boards have a durable, waterproof makeup that contractors can use to fortify outdoor structures with steel and wooden studs.
Perhaps the biggest advantage to using cement boards for exterior construction is they aren’t prone to mold buildups. Apart from being highly water-resistant, they lack sufficient organic makeup to even support fungi growth. Their water-resistance is also why they’re a good option for structures constantly exposed to water, such as showers, hot tubs, and pools.
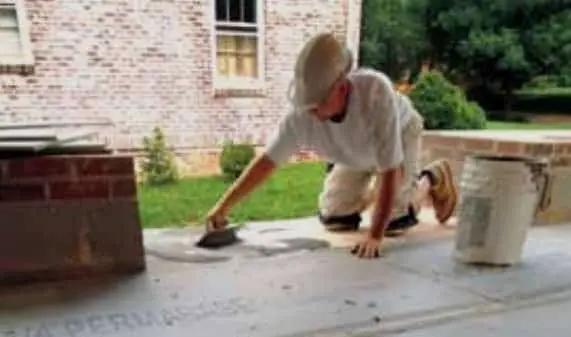
Factors To Consider When Using Cement Board on Exterior Walls and Flooring
Should you use a cement board base for your outdoor structures? Here are the most important factors to consider:
Durability and Longevity
Cement boards outperform gypsum paper base alternatives such as blue boards and green boards regarding durability and longevity. They come in both water-resistant and waterproof options.
On the other hand, green boards can only tolerate a certain level of exposure to moisture, while gypsum paper does not even have any resistance against water.
If your focus is to create a durable outdoor fixture with strong resistance against harsh weather conditions, cement boards would be a great investment. Combine it with a high-quality vapor barrier or adhesive mortar to maximize its water-resistant qualities.
Cost
If your goal is to keep the construction overhead as low and affordable as possible, then cement boards might not be a good option for your project. They’re relatively pricier than gypsum paper alternatives. Statistics show that the average cost of Portland cement is $113.59 per metric ton. Meanwhile, gypsum paper is at a measly $8 per metric ton.
Although, when it comes to long-term cost-efficiency and durability, cement boards outperform gypsum paper. The latter is overall less durable. We’d only suggest using gypsum paper on outdoor structures you don’t plan on exposing to harsh weather conditions.
Maintenance
Since cement boards are generally more durable, they’re also less prone to defects and damages. As long as you install the board properly and follow basic maintenance, you shouldn’t have to deal with any major, expensive issues until after a few years.
Plus, cement boards repel moisture and water, so you won’t have to worry too much about mold and mildew buildups. On the other hand, gypsum paper provides little to no water resistance. After a few years of exposure to heavy rains and snowing, you might spot a few mold buildups developing in the corners.
Ease of Installation
If you’re planning on installing the cement board yourself, we strongly suggest seeking help from another experienced handyman. Trust us when we say that cement boards are a lot heavier than any gypsum paper board. Cement board installation is not a one-man project.
Plus, cement board installation requires specific tools such as saw and carbide blades since its surface is denser and harder to cut than gypsum paper. We also suggest setting aside at least one day for the cement to dry.
Winner: Cement Boards
Considering all these factors, we can confidently say that cement boards are the better base for most outdoor structures. They’re pricier and more difficult to install. However, considering their durability, long-term cost-efficiency, longevity, and overall resistance to harsh weather conditions, a few extra bucks is a small price to pay.
The only time we would recommend using gypsum paper is if you’re on a very tight budget and longevity is not of much importance. For example, homeowners and contractors finishing temporary outdoor structures won’t need the durability and longevity cement offers as their structures aren’t meant for long-term use.
Top 9 Most Important Tips To Properly Install Cement Board Outdoors
As we mentioned earlier, installing cement boards is a beginner-level DIY project. Most homeowners equipped with basic handyman skills and tools can set up cement boards on exterior walls in just one to two days—the exact project completion time depends on the project size.
Although, if you want your setup to last, we suggest doing prior research. It’s a bit of a hassle, but a few extra hours of reading tips and guides online is a small price to pay for high-quality boards built to last decades.
To help you get started, we’ve compiled some of the most helpful tips homeowners should bear in mind when setting up outdoor cement boards:
Use High-Quality Concrete
First and foremost, you need to invest in high-quality materials. Cement boards are relatively pricey, so some contractors and homeowners try to reduce overhead by using cheaper, more affordable cement. Overdone cost-cutting is a big, yet sadly, common mistake.
Bear in mind that concrete is not 100% waterproof. Moisture will still seep in, but the amount that passes through depends on two factors: the amount of water running and the quality of the concrete used.
Sadly, there’s not much you can do to limit the cement board’s exposure to water. The better approach here is to use high-grade concrete with better resistance to water and moisture buildup.
Replace Old Cement Boards
Cement boards are strong and durable, but they won’t last forever. On average, most cement boards have a lifespan of around 50 years, so if you’re remodeling an old house that has cement boards dating several decades already, consider replacing them.
Pro Tip: Make sure you get in touch with your cement board manufacturer to see if the fixture is still under warranty. Most cement board manufacturers have a 40- to 50-year warranty on their products.
Cut the Cement Board Properly
Cutting cement boards is far different from slicing gypsum paper. Firstly, cement boards are much harder. You’ll need a carbide-tipped saw blade to smoothly glide through the board and slice the edges properly. We suggest using blades with four to six teeth.
Secondly, cement boards are extremely messy. Avoid working in lawns, gardens, or areas where you wouldn’t want sawdust flying around. A good workaround here is to use power saw tools with a dust-collecting system.
Waterproof the Surface Underneath the Cement Board
Finished cement boards are generally waterproof and resistant against mold/mildew buildups. However, they’re not impervious to water. Even if it’s a very small amount, water may still pass through the pores of your cement board and build up in the base underneath it. While the board itself has resistance to fungi growth, the sub-surface doesn’t.
To resolve this issue, set up a vapor and moisture barrier. Moisture barrier prevents outside water from seeping through the tiles and cement board, while vapor barriers prevent vapor from penetrating the sub-surface.
Do not confuse vapor barriers with moisture barriers. Too many people use these terms interchangeably. However, they have different meanings, purposes, and installation instructions. Mixing them will compromise the stability of your cement board.
For flooring installations, on the other hand, try installing a thin-set adhesive mortar underneath the tiles and cement board—this should apply to both indoor and outdoor projects.
Determine the Correct Side of the Cement Board
A common mistake DIY first-timers commit is ignoring the proper parts of their cement boards. If you examine your boards, you’ll see that they have rough and smooth sides.
The rule is you need to install the cement board with the smooth side facing the sub-surface if you’re using thin-set mortar adhesive as a waterproofing layer. Alternatively, face the rough side toward the subsurface if you have latex mastics such as a vapor or moisture barrier.
Leave Gaps Between the Boards
Make sure there are 1/8-inch (0.32-cm) gaps between the boards. Fill in the gaps with the thin-set adhesive mortar underneath and a top layer of silicone caulk. Compared to trimming the boards’ edges manually—which can be very time-consuming and stressful on the hands—filling in the gaps with caulk and mortar is much simpler.
Pro Tip: Do you feel like the silicone caulk and thin-set mortar aren’t enough? You can further boost your cement board’s resistance to water by covering the gaps with waterproof mesh tape.
Let the Cement Board Dry Completely
Don’t rush the installation. Whether you plan on using the cement board as is or finishing it with coating/stucco, let the boards completely dry first. We advise letting the cement set for at least one whole day—two if it’s cold outside.
Using the cement boards while they’re still wet will lead to serious long-term defects. These include issues such as board instability, moisture retention, and structural weakening. Note that the only way to remedy these issues is to take down the whole setup and start from scratch.
Clean Dirty Cement Boards Before Finishing
Always clean your cement boards before finishing them, regardless if you’re constructing an indoor or outdoor structure. Loose debris will affect the stability of your tiles, stucco, or paint. They’ll look flimsy and poorly done.
Plus, they won’t be as durable. If you attach tiles to a cement board loaded with sawdust and debris, the adhesives won’t set properly and weaken the attached tiles’ overall integrity. Poorly attached tiles might fall off years or even months after the installation.
If you’re cleaning a freshly installed cement board, smoothen out the top layer, let the cement fully set, then polish out any loose debris.
On the other hand, cleaning old cement boards is a bit more complex. Take out your garden hose and use it to remove any visible dirt marks. Then, use a degreaser to get rid of tougher stains. Finally, let the cement boards dry for at least one full day.
Finish Exterior Cement Boards With Paint
One of the most common reasons people dislike using cement boards on outdoor structures is they don’t look aesthetically appealing. The cement has a rugged, unfinished look. Unless you cover it with stucco or tiles—which are both inadvisable for outdoor structures—they’ll simply look like a flat layer of concrete.
If you’re fine with a rough, rugged vibe, then, by all means, use the cement board as it is. However, most contractors and homeowners would want to build an exterior wall or flooring that’s unique, customized, and elegant, and one way to do so is by painting the boards.
For a simple, modern vibe, go for plain, monochromatic designs. Meanwhile, those who want to make a statement can explore louder colors. Although, you’re free to explore all the color patterns and designs available.
Painting your cement boards also strengthens their overall integrity. These boards consist of concrete, glass, wood, and other porous reinforcing fibers that absorb small amounts of liquids. So once the paint sets, there’ll be less space for moisture to seep in.
Final Thoughts
Here’s a recap of the most crucial tips to build a strong, durable cement board base outdoors:
- get high-grade materials
- place moisture barriers and adhesive mortar underneath
- leave 1/8-inch (0.32-cm) gaps between boards
- use silicone caulk to fill in gaps
Also, consult with a professional contractor if you’re undecided on using cement boards outdoors or aren’t confident about doing the installation yourself. Hiring third-party specialists will spike your overhead. However, it’s a necessary expense if you have no prior handyman experience. Don’t compromise the quality of your cement board installation just to save a few bucks.

